

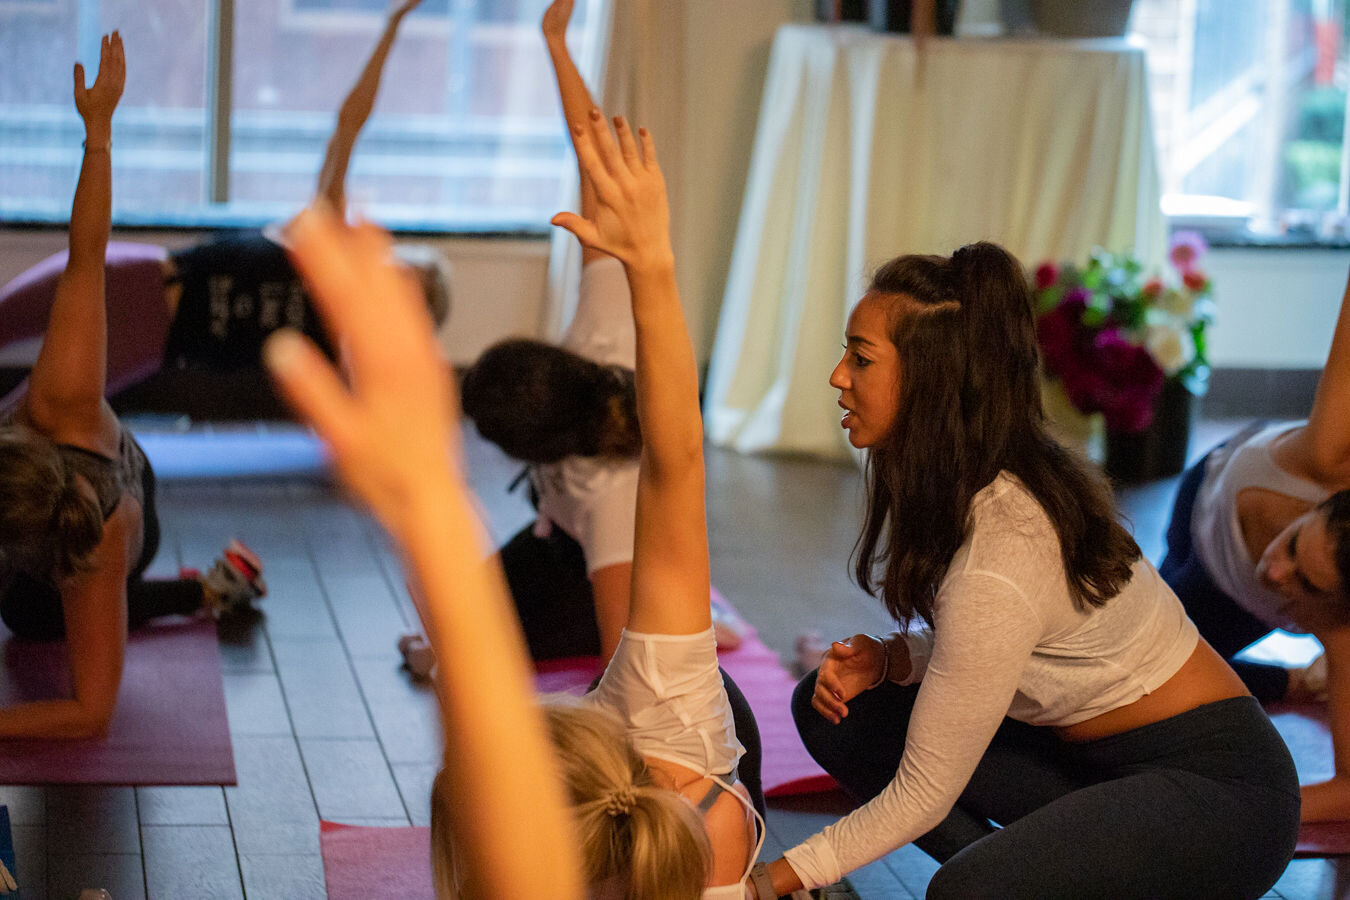
Group classes are all about f l o w and s m o o t h transitions. These two key elements are at the heart of how a client perceives and differentiates a great workout from a mediocre one. Nail these two components and clients will leave feeling invigorated, happy, and wondering where the hour went. On the flip side- even if you had great exercises but the workout felt choppy and they were frequently changing positions for what feels like no reason, they’ll leave frustrated, annoyed, and wondering why class felt so long.
It’s important to consider the reasons why people choose groups over privates and the number one reason is affordability. Some group fitness clients may do both privates and group classes, but the majority are only doing groups because it’s the most cost effective AND efficient way to get their workouts in. Efficiency means group fitness clients want to feel like they worked every part of their body evenly UNLESS the class is specifically focused on a particular body part (e.g.: a booty focused class). They don’t want to leave feeling like they worked a ton of legs, but didn’t get enough arms or core. Programming a well balanced workout that feels challenging but doable is of utmost importance. Group fitness clients (in particular!) want to feel challenged! They’ll never come back if they felt like the workout was too easy.
Pre- programming for group classes is an absolute must, especially in the beginning of your pilates career. Knowing your setup, transitions, and choreography and delivering clear instructions allows you to maximize flow which creates an unforgettable client experience. In addition to the workout itself, there are many other dynamics that come into play in the group setting such as tone/pace in your delivery, cueing, correcting clients, how to balance demonstration with your words, and music (and the energy it creates). This may seem like a lot to manage but with some solid guidelines and awareness of what the group environment entails, you can deliver great classes that will be waitlisted in no time. Below are my top tips for success:
Tip #1: Know your audience.
If possible, check Mindbody or whatever scheduling software your studio uses before class and review the client intake forms of the students in class. This way you’ll have a general idea of major injuries or pathologies you’ll be working with and can pre-plan modifications for people (or avoid certain movements all together).
If you end up not having time for the above, or even in addition to: walk around to each student and introduce yourself at the beginning of class and ask if they have any past/current injuries or chronic aches and pains. This offers an opportunity for you to build rapport and they’ll be happy to see you’re taking an active interest in them.
If you’re taking over a class time from a teacher who taught at that time regularly, be sure to ask that teacher what the clients are like (ages, personalities, etc.) and what they enjoy doing. This will help with greatly with programming and gives you a heads-up of what to expect in regards to the group energy.
When teaching, observe attendees and note predominant patterns in the group; this can help you determine the direction for future classes. For instance if you’re teaching swan and you notice people don’t have a lot of ROM (range of motion), maybe this group needs to spend some time working on thoracic mobility and smaller extension movement preps first. Or if you notice people struggling with proper form in planks, perhaps you spend extra time going over it and building up to it in the next class.
Tip #2: Know your space and set it up.
For equipment classes, know how many of each piece of equipment and props you have to ensure everyone can do the exercises at the same time (unless you’re teaching a circuit class, which is a whole other thing that we won’t get into here).
For mat classes or workshops:
If it’s not a space you’re in regularly: go and check out the space beforehand so you know exactly what props are available and how many they have. Sometimes group class capacity exceeds the props available and that is an issue you don’t want to deal with when you get there that morning and you’ve already programmed a class using that prop!
Additionally, you’ll want to check out the room dimensions (is it wider than it is long? Is it a narrow space that’s long/deep?) because that will help you determine how you want people to set up their mats and where you want to orient yourself in relation to the rest of the class. You may also need to eliminate or modify some moves that take up a lot of space if you have a more narrow room (for instance, have people lunge forward instead of to the side so they don’t run into each other; turn mats sideways if you have a wide but not deep room).
Set up a mat or whichever piece of equipment you’re using for class with all the props you’re using for class so clients can copy your setup and grab their props as they walk in. This saves time and shuffling around in the middle of class which can be very disruptive.
If teaching equipment, set all towers/chairs/reformers to the spring setting for the first exercise so people are ready to go.
Tip #3: Execute solid group class programming by following this order:
Never start class in a static stretch (as in Eve’s lunge or single thigh stretch on the reformer, or just a standing forward fold). Setting the tone for the workout is important - you want to get people ready to move. They came to move, not stretch. Stretching is only effective after muscles are fully warmed up anyway, so save stretches for after the warm up, after working a particular muscle group (such as side leg series, you could do a seated figure 4 stretch afterwards), or at the end of class.
Start with movements that warm up the entire body, which means you’re going to want the larger muscle groups such as the quads, glutes, and hamstrings working. Here are some examples:
Footwork with hand weights (or no weights)
Standing arm weights series on the mat
Standing arm springs on the tower with the lower body incorporated, like squats with bicep curls
Forward Step ups on the chair
F L O W: design the workout with smooth transitions by making the most of each body position they’re already in. Group exercises together based on maximizing client body position (this allows for more seamless transitions). Examples:
If you’re doing kneeling front rowing or reverse expansion on the reformer where clients are already kneeling facing the footbar, go into Down Stretch, then to long stretch, then up stretch or elephant. Then to stomach massage, and from there you could go to lying on their backs (they’re already halfway there and their feet are already on the footbar!) for footwork or hip lift OR transition to side work and do mermaid to kneeling side arm series.
If you’re on the mat doing side planks, go right into side lying leg series afterwards and have them roll onto their stomachs for prone work before moving on to the other side.
If you’re on the tower doing leg springs on their backs, go right into mid back series with the arm springs afterwards or teasers with the push thru bar.
Ensure a well rounded workout in all planes of motion (frontal, sagittal, transverse) that hits every body part. They should be moving in all planes of movement ( rotation, extension, lateral flexion, and flexion).
Ensure they get arms (chest, back, triceps, biceps), legs (abductors/adductors, quads, glutes, hamstrings) core (obliques and rectus and TA), and spinal/hip/ankle/shoulder mobility as needed.
Include modifications for each exercise as appropriate and use prep movements for more complicated exercises so clients who don’t feel comfortable with the full exercise can continue doing the prep/modified version. You also then have the advantage of building the class up to the full exercise together which sets them up for success. Examples below:
Side plank on the mat: have everyone do the bottom knee down version together, then have them go into the full exercise, letting them know that if it doesn’t feel right they can stick with the bottom knee down
Teaser on the reformer: start with the prep movement of seated in boat pose on top of the box and moving the arms forward and back only (or you can even have them hold the boat post and just use handweights). Then go into the full exercise.
If you’re incorporating props, make sure they have a clear purpose that you can articulate to clients and you’re not just adding them for the sake of variety. (E.G.: We’re adding a block between your inner thighs for the short box series today to activate your inner thighs which deepens your connection to your abdominals!) If you’re really a beginner teacher, sometimes it’s best to leave props out until you feel you’ve mastered the choreography of the exercises as they are without anything added.
End class in a seated or standing up position (NOT lying flat on back). This gives clients a sense of completion and it makes the transition to cleaning up after class easier (there’s flow coming into play again).
Variety is a variable to consider when teaching a standing group class weekly. In my experience, group fitness clients, (and even some private clients, although there are always exceptions to the rule) don’t want to do the same routine (same order, same exercises) every week- they really appreciate variety in the workout. You can do some of the same moves each week, in fact, it’s really beneficial to balance the learning experience of repetition with the addition of new things to make the workout feel different. Another strategy is to do the same moves, but mix up the order. You don’t have to reinvent the wheel every class but just make sure you’re keeping things fresh and interesting.
Tip #4: Use economy of words for a good client experience.
Layering is important! Don’t give people too much information at once. Ever been to a class where the teacher was throwing cues and setup and breathing at you and you didn’t know what you were supposed to be doing or feeling? People get confused easily so it’s important to break things down. I like to follow the order below when teaching exercises to groups:
Starting position first!: Get them into the exercise with clear and thorough instructions on starting position - no talk about breathing or anatomical cues YET! Simply get them into position. (E.g.: For Back Rowing/Plow on reformer: Sit on the reformer facing the shoulder blocks with your legs straight out in front of you on the headrest with your right ankle crossed over the left with one strap in either hand. )
Choreography next: state clear and concise instructions of the actual exercise choreography. When doing more advanced movements, start simple and LAYER in the next parts of the exercise (see modifications bullet above). (E.g.: For Back Rowing/Plow on reformer: Reach arms down by sides with palms facing back behind you and press your arms back as far as you can without tipping forward).
THEN cues and breath LAST:
Sequencing of cues is important - order can be modified to get people to lead with the correct muscles. Start with the muscle that should be working to initiate the movement.
Cue oppositional energy of the body - e.g. arms reach forward and navel reaches up and back
Cue what’s moving and what’s not - e.g. in side leg series- torso and bottom leg steady as you move the top leg only
Add breath into the cues
E.G (still back rowing on reformer).: Inhale to grow taller reaching the crown of the head up to the ceiling and sitting bones down into the carriage, exhale to engage the triceps and back of the shoulders to press those arms down, up and back behind you keeping shoulders stacked over ribs and hips, inhale to stay tall and bring arms forward. The torso stays completely still as you move your arms through space.
Always be motivational and give good feedback in the form of praise of something they’re doing really well; positive reinforcement is important! It builds group morale and energy. It’s nice to be specific if possible- for instance- “Everyone is doing such a great job of twisting from the waist while keeping those hips nice and square! You guys are really getting this. VS. Nice twists class!!”
A word about counting: counting is NOT the most important thing-everything will even itself out eventually. The most important thing is flow and transitions and when you count, it takes you away from setting up your next move or cueing the body in a way that allows people to get more out of the movement. I like to count down the last few reps so people have an idea of when the torture is ending- they are more likely to continue even if they’re fatigued when there’s a concrete end in sight.
Always be two steps ahead of the class in your mind so you can move seamlessly into the next exercise.
Avoid filler words/phrases: such as “I want you to” and “now we’re going to”. Having firm command of the class and knowing exactly what exercise and setup is next will alleviate your need for these words.
Tip #5: Don’t be afraid to demonstrate.
There is some controversy in the pilates world surrounding this- and I believe it comes from the fact that teachers shouldn’t rely SOLELY on demonstration to get the class in position. As with anything else, balance is key here. You should be able to convey what’s going on with JUST your words BUT if it’s available to you demonstration can be a really helpful tool. I always say that group fitness without demonstration can be like if a math teacher asked you to do an algebra problem without putting an example on the board first. We’re moving, so it logically makes sense that words sometimes won’t translate to perfect execution of movement. Sometimes people need to see a physical example before they comprehend it, especially if the group is more kinesthetic.
It can be hard to balance demonstration with walking the room, especially in group mat class situations. My advice is to do a few reps then walk around OR have a student in the front of the class be your demo body.
If you’re teaching group equipment class and don’t have a machine to demo on, use a student as an example.
Tip #6: Use care when correcting clients.
Before you do any hands on corrections, always be sure you ask if they’re OK with touch first. You need that verbal consent because some people are not comfortable with it.
Note that in some situations (e.g.: very crowded mat classes), it will not be feasible to get to everyone who needs help so pick the person that looks like they could hurt themselves and go there first.
Frame your words about modifications/corrections appropriately: pride is a thing to consider here. People don’t like to feel wrong and they don’t like to feel like they’re doing an easier version of something so saying things like the below can help them be more receptive to your corrections/modifications:
“This version might be better for you”
“This position is better for your body”
“You will feel this exercise more if…”
“I want you to get more out it and if you XXXX you’ll feel the right muscles more”
“I do this too”
It takes years to manage the delicate balancing act of keeping up the flow of the class while correcting people. Don’t worry, it gets easier with time and experience! When you’re first starting out you might not correct as much and that’s ok. Rome wasn’t built in a day!
Tip #7: Be flexible.
Don’t be too married to your pre-planned workout that you can’t make changes on the fly. You may have a workout in mind for group and then you watch them moving for the first 5 minutes and realize that some of the exercises you had planned might not work for these people. Your ability to handle these types of situations with improve with experience and time so be patient with yourself.
Tip #8: BE the energy.
Groups are a major energy exchange and as such they require a lot more from you as a teacher than privates. You must carry the energy of the room and be positive, upbeat, engaging, and assertive. Leave whatever sadness or drama that’s going on in your life at the door. People want to feel inspired and motivated!
Project confidence by using a more authoritative tone of voice that keeps pace throughout.
Gauge the overall vibe of the group and adjust your pace and word choice accordingly. For example, if the group is tired and distracted- they’ll need less cueing and more matter of fact instructions and perhaps a louder voice. You may even simplify your choreography for the day and eliminate some of the more complex moves.
Don’t allow disruptions such as small talk: if you have a particularly chatty group addressing them as a whole before class starts is a great way to deal with it. Saying something like “We have an intense workout planned so I need you to stay completely focused so we can get through everything!” helps get the point across without being too direct.
Tip #9: Be aware of music and the pace/energy it can create
Music does help set the tone and pace of a workout so if you do have the ability to create playlists or use Spotify, just be aware of that. The average beats per minute (BPM) that I’ve found helps set the pilates pace is usually around 100 (vs. 120-180 used for barre or cardio workouts).
Knowing your audience comes into play here as well. Do you have a more middle aged crowd? In that case you might not want to be blasting Cardi B and Drake- 80’s hits or lounge musice might be more appropriate. Think about the personalities in your class and what they might like. I had a fabulous group of women in their 30’s/40’s/50’s when I taught barre and power mat and I used to do themed playlists (70’s one week, 80’s another, etc. and they loved it!). Music just offers another opportunity for you to tailor the experience to the clients and they notice these subtleties.
Tip #10: Start and end on time.
This one is pretty self explanatory. Don’t wait for late students because it sets the tone that lateness is acceptable. Begin promptly and end right on time.
Some studios have a policy that if you’re more than 10 minutes late you forfeit class because of disruption, which helps set the expectations for clients to be on time.